No Products in the Cart
At the very heart of modern diagnostics and genetic research, you'll find a deceptively simple piece of equipment: the PCR reaction tube. This tiny plastic vessel isn't just a container; it's a miniature bioreactor, creating the perfect self-contained world for the Polymerase Chain Reaction to work its magic. This is where a single strand of DNA can be multiplied into millions of copies.
Think of yourself as a detective with just one microscopic clue—a single piece of DNA. To properly analyse it, you need a lot more to work with. A PCR reaction tube is like a specialised interrogation room where this one clue is copied over and over again until you have enough evidence to build an airtight case. It’s where the incredible process of DNA amplification happens.
This process is the bedrock of countless applications, from diagnosing infectious diseases and spotting genetic disorders to pioneering new cell therapies. The reliability of every single outcome hinges on the quality and performance of the tube itself. Every little detail matters.
Picking the right PCR tube is far from a minor detail—it has a direct impact on the accuracy and reproducibility of your results. A few key factors are what separate a high-performance tube from a standard one:
These points are crucial not just for the PCR process but for everything that comes after. For example, the integrity of a sample headed for long-term storage depends entirely on how it was handled from the very beginning. While PCR tubes are perfect for amplification, more specialised containers are needed for other sensitive processes. You can learn more about the strict requirements for cryogenic storage for biobanking and stem cell research in our detailed guide.
This increasing reliance on PCR for both diagnostics and research is fuelling massive market growth. In fact, the global PCR technologies market is projected to hit approximately USD 31.39 billion by 2034. Consumables like reaction tubes are a vital and growing part of that story. For more on this, you can check out the market growth insights on Precedence Research.
Picking the right PCR tube format isn't just a minor detail—it's a decision that fundamentally shapes your lab's efficiency and the success of your experiments. Think of it like a chef selecting the right knife for a specific cut; the vessel you choose for your reaction has to match the job at hand. Your decision will hinge on your daily workflow, how many samples you run (your throughput), and the exact experiment you’re performing.
The options are broad, from single tubes perfect for small-scale tests to large multi-well plates built for high-throughput screening and automation. Each format brings its own distinct advantages to the table, tailored for different lab setups.
For maximum flexibility and smaller batches, individual 0.2 mL or 0.5 mL tubes are the undisputed champions. They are perfect for troubleshooting a tricky protocol, optimising a new assay, or when you’re just running a handful of samples. This approach is great for minimising waste because you only use exactly what you need.
When your sample numbers start to creep up, PCR tube strips offer a fantastic middle ground. Usually found in strips of 8 or 12, they make handling a breeze and seriously cut down the risk of mixing up samples compared to juggling individual tubes. They’ve become a firm favourite in research labs where the scale of experiments can change from one day to the next.
This decision-tree infographic gives a great visual guide to the selection process, steering you based on your lab's main applications and requirements.
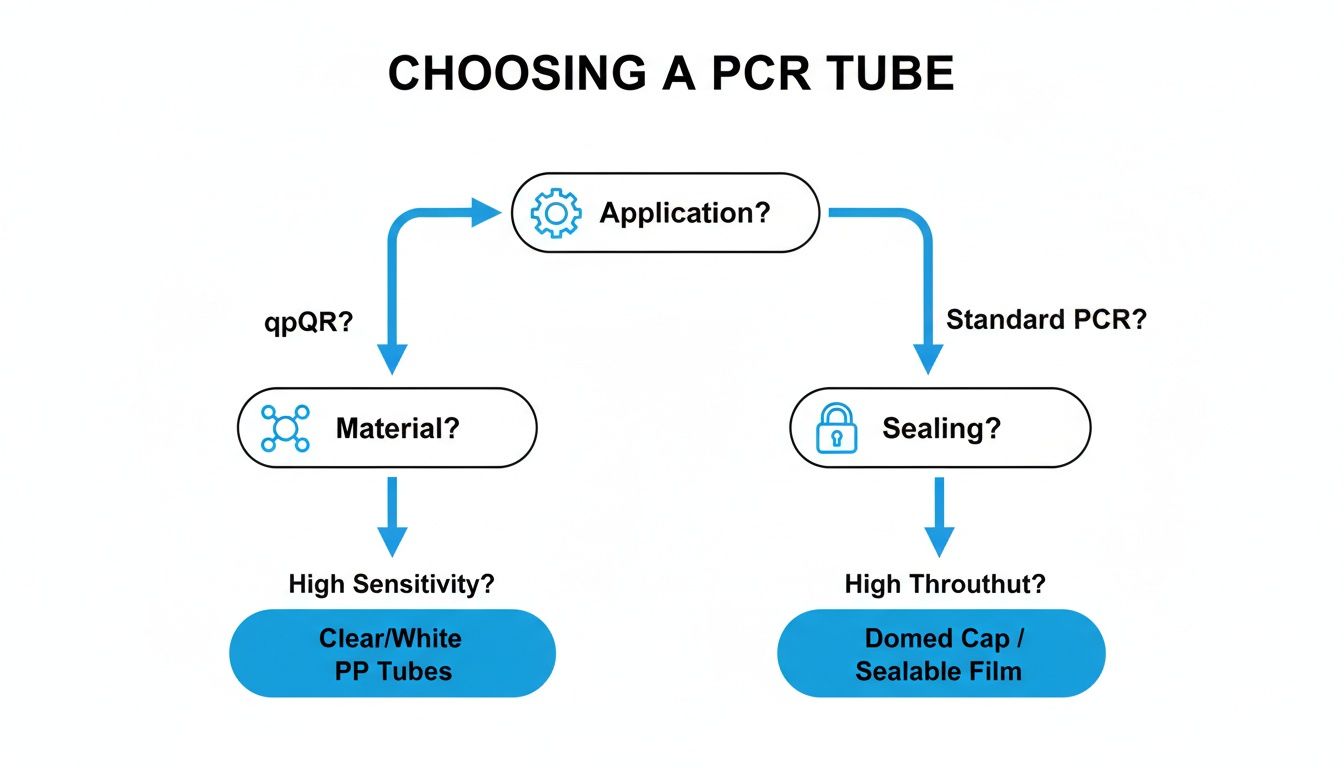
As the flowchart shows, practical factors like throughput needs, automation compatibility, and the specific reaction type all point you toward the most logical format.
To simplify the choice, here's a quick comparison of the common formats and where they shine.
| Format | Typical Volume | Best For | Key Advantage |
|---|---|---|---|
| Individual Tubes | 0.2 mL or 0.5 mL | Small-scale experiments, protocol optimisation, low sample numbers. | Maximum flexibility and minimal waste. |
| Tube Strips | 0.2 mL | Medium-throughput work, routine assays with 8-12 samples. | Easier handling and reduced risk of sample mix-ups. |
| 96-Well Plates | 0.1 mL or 0.2 mL | High-throughput screening, diagnostics, automated workflows. | Compatible with multichannel pipettes and robotics. |
| 384-Well Plates | 30-50 µL | Very high-throughput applications, large-scale genetic screening. | Maximises sample processing and minimises reagent use. |
This table lays out how each format serves a different scale of work, from individual reactions to mass screenings.
When you're staring down dozens or even hundreds of samples, 96-well or 384-well PCR plates are no longer a luxury—they're a necessity. These formats are the workhorses of high-throughput workflows in diagnostic labs, pharmaceutical research, and massive genetic screening projects. Their standardised layout is designed to work seamlessly with multichannel pipettes and robotic liquid handlers, which dramatically boosts speed and slashes the potential for manual error.
A key consideration with plates is their skirt design. This seemingly small detail affects stability and compatibility with automated systems. An unskirted plate has no side wall, a semi-skirted plate has a partial one for better stability, and a full-skirted plate provides maximum rigidity, making it ideal for robotic arms.
The German market for PCR technology, a real powerhouse in Europe, is heavily invested in these advanced, automation-friendly formats. Valued at USD 846.55 million in 2024, the German Polymerase Chain Reaction Technology market underscores the country's sharp focus on precision diagnostics and sophisticated lab automation. This really highlights the critical link between high-quality consumables like the PCR reaction tube and the advanced lab infrastructure needed to run them. If you're interested in diving deeper, you can explore Germany's role in the European market through Cognitive Market Research's regional analysis.
The humble PCR tube might seem like a simple bit of plastic, but its material science and clever engineering are what really make or break your experiment. When you get down to it, the performance of this tiny vessel hangs on two things: the purity of its material and the precision of its physical design. Nailing your choice of tube based on these qualities is the first step toward getting accurate, reproducible results.
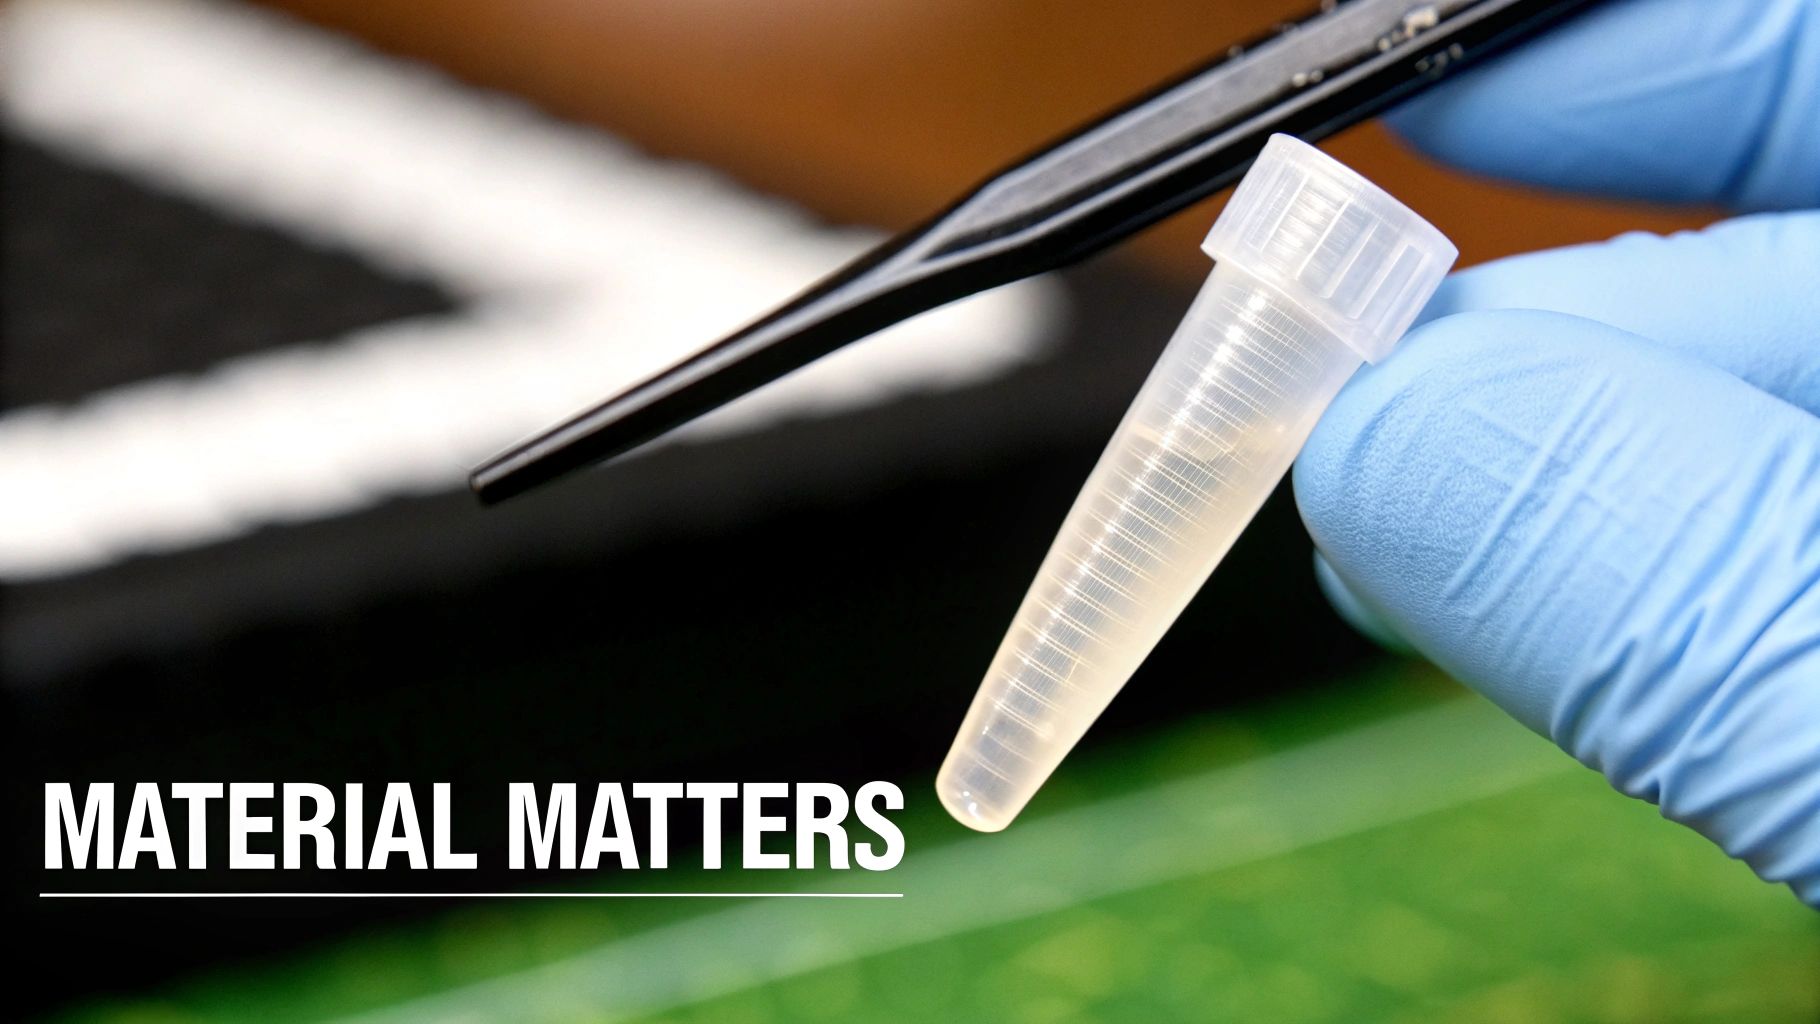
The undisputed gold standard for any high-quality PCR reaction tube is 100% virgin polypropylene. This specific polymer is the material of choice because it’s chemically inert and handles rapid temperature swings like a champ, ensuring it won’t react with your sample or degrade during thermal cycling.
More importantly, its low-binding surface means your precious DNA, enzymes like Taq polymerase, and primers won’t get stuck to the tube walls. This is crucial because it keeps all your reagents in the mix and available for the reaction, which maximises your amplification yield and sensitivity. If you opt for tubes made from recycled or lower-grade plastics, you’re running a huge risk of chemical leachates seeping into your reaction and inhibiting it completely.
Beyond the material itself, the actual shape of the tube is engineered for one primary purpose: lightning-fast heat transfer. PCR is all about hitting precise temperatures rapidly and repeatedly, and the tube is the bridge between the thermal cycler's heating block and your reaction mix.
Think of it like boiling water. A thin metal pot heats up much faster than a thick ceramic one because heat travels through the material more easily. The exact same principle applies here.
A PCR reaction tube with ultra-thin, uniform walls allows for immediate and even heat transfer. This ensures that the entire reaction volume reaches the target denaturation, annealing, and extension temperatures at precisely the right time, leading to optimal amplification efficiency.
If the walls are too thick or inconsistent, you can get cold spots inside your sample. This leads to uneven amplification across the mixture, giving you unreliable, skewed results. It's a particularly big problem in quantitative PCR (qPCR), where every bit of precision counts.
For any kind of sensitive molecular work, the purity of your consumables is just as important as the purity of your reagents. Contamination can torpedo your results, wasting valuable time, samples, and money. That's why reputable manufacturers provide certifications guaranteeing their tubes are free from the usual suspects.
You should always look for tubes that are certified as:
These certifications aren't just marketing fluff; they're a promise of quality control that underpins the reliability of your experiments. By understanding these material and design fundamentals, you can evaluate a PCR tube for what it really is—an active component of your experiment—and not just by its price tag.
A successful PCR experiment is built on precision, and nothing undermines that precision faster than a failed seal. The humble cap on a PCR reaction tube is the last line of defence against two major threats that can completely derail your results: sample evaporation and cross-contamination.
Getting the seal right is non-negotiable for protecting the integrity of your experiment.
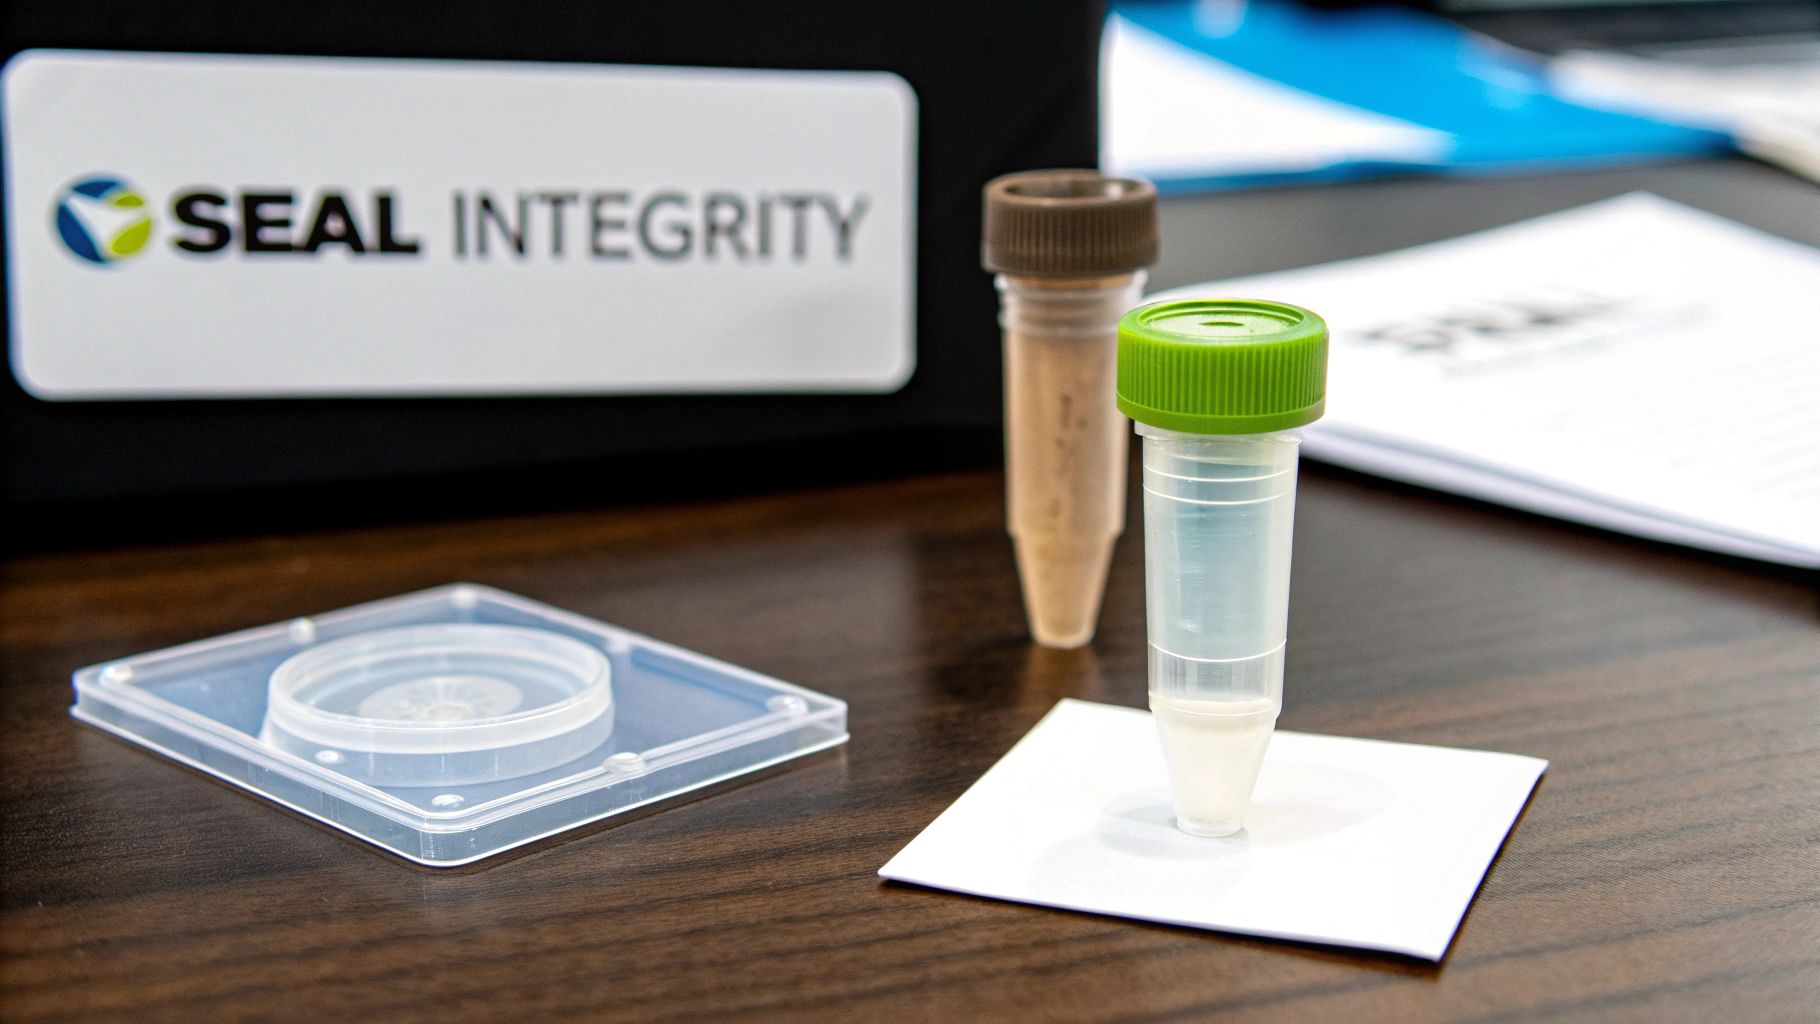
During the high-temperature denaturation step of thermal cycling, which often reaches 95°C, pressure builds up inside the tube. Even a microscopic gap in the seal can allow precious sample volume to escape as vapour. This volume loss concentrates the reagents left behind, altering the reaction kinetics and potentially leading to inaccurate or failed amplification.
The type of cap or seal you choose often depends on the PCR tube format and the specific application. Each option offers a different balance of convenience, sealing security, and compatibility with downstream analysis.
A secure seal does more than just prevent evaporation; it also contains aerosols. When a tube is opened, microscopic droplets containing amplified DNA can become airborne and contaminate other samples, the workspace, or pipettes, leading to false-positive results in future experiments.
Maintaining a pristine lab environment is just as crucial as having a good seal. Contamination control is a systematic process that minimises the risk of introducing unwanted DNA or enzymes into your reactions.
One of the most effective strategies is to establish a unidirectional workflow, creating physically separate areas for pre-PCR (reagent preparation) and post-PCR (amplicon analysis) activities. You should also regularly decontaminate surfaces and equipment, including pipettes and tube racks, with solutions designed to eliminate DNA.
For your laboratory, it is also important to consider the accessories that help maintain a clean and organised workspace; discover more about useful cryogenic accessories that will come in handy for a well-equipped setup.
By mastering both physical sealing techniques and disciplined contamination control, you ensure your results are accurate and reproducible every time.
Once your thermal cycler has finished its run, the journey for your amplified sample is far from over. What happens next is crucial for preserving the integrity of your hard-won PCR products, but the right storage method really depends on your timeline and long-term goals. Getting your samples from the cycler to the freezer isn't just a simple transfer; it requires a bit of thought to avoid compromising your results.
For most day-to-day lab work—like if you're planning to run a gel or prep for a cleanup protocol in the next few days—storing your PCR reaction tube at -20°C is standard operating procedure. This temperature is perfectly fine for preventing enzymatic degradation and keeping your DNA stable for any immediate downstream applications. A regular lab freezer will do the job nicely.
However, when you start thinking about long-term cryopreservation instead of just short-term storage, the rules of the game change completely.
A common, and frankly dangerous, misconception is that a standard pcr reaction tube can be tossed into liquid nitrogen (around -196°C) for long-term storage. Let's be clear: these tubes are absolutely not built for that kind of extreme cold.
The virgin polypropylene used for PCR tubes is a marvel of engineering for one thing: rapid heat transfer. It’s not designed to handle the immense stress of cryogenic temperatures. When you plunge it into liquid nitrogen, the plastic becomes incredibly brittle and is almost guaranteed to crack. This leads to catastrophic sample loss and cross-contamination.
It doesn’t stop there. The seal on a standard cap isn't designed to stay tight under such conditions. The drastic temperature shift can cause the seal to fail, allowing liquid nitrogen to seep inside the tube. When you warm it up, that trapped nitrogen expands rapidly, creating a very real explosion risk that can injure staff and compromise every other sample in your storage container. For labs managing long-term sample collections, it's essential to understand the demands of a proper ultralow temperature freezer and the specialised tubes it needs.
For any application that requires keeping samples viable for the long haul, like in biobanking or preserving cell lines for therapy, dedicated cryovials are non-negotiable. There's a reason they're the gold standard. These vials are purpose-built for the deep freeze:
Choosing the right container is fundamental. While a pcr reaction tube is the perfect tool for the amplification step, a cryovial is the only safe and reliable choice to ensure your precious samples remain secure for months or even years to come.
Even the most buttoned-up protocols can't account for every little thing that happens at the bench. Sometimes, the smallest details about your consumables—like the humble PCR reaction tube—can be the difference between a clean result and a failed experiment. Let's tackle some of the most common questions that pop up, helping you refine your technique and sidestep those frustrating issues.
The short answer? It's a really bad idea. In fact, we'd say you should never reuse PCR reaction tubes.
The biggest danger is cross-contamination. Even a minuscule amount of amplified DNA, or amplicons, from a previous run can cling to the plastic and lead to glaring false-positives in your next experiment. It's like trying to perform a delicate chemical reaction in a dirty test tube; you just can't trust the results.
On top of that, the intense heat cycles of PCR can degrade the plastic's integrity. You might end up with micro-cracks you can't even see or a cap that just won't seal properly a second time around, leading to sample evaporation. For reliable, accurate data, always start with a fresh, sterile PCR tube.
The choice between white and clear tubes really boils down to what kind of PCR you're running.
Clear Tubes are your go-to for standard, conventional PCR. The transparency is practical—it lets you quickly eyeball the contents to make sure your reaction mix is in there and that you've gotten rid of any pesky bubbles.
White Tubes are engineered specifically for Quantitative PCR (qPCR), also known as real-time PCR. The opaque white plastic acts like a tiny mirror, reflecting the fluorescent signal up towards the instrument's detector instead of letting it scatter. This dramatically boosts the signal-to-noise ratio, giving you much better sensitivity and consistency in your qPCR data.
For any real-time PCR or qPCR work, white tubes are the industry standard. They are hands-down the best choice for achieving the most sensitive and reproducible results.
A cap popping open mid-run is a classic lab headache. It's frustrating, but it's usually caused by one of two simple things.
First, the cap might not have been sealed correctly from the start. When using individual caps, always listen for that satisfying "click." If you're using tube strips, press down firmly and evenly across the entire strip to ensure every single cap has a tight seal.
The second culprit is often the thermal cycler's heated lid. If the lid isn't applying enough pressure or isn't set to the correct temperature, the pressure building up inside the tube during the 95°C denaturation step can easily force the cap open. Before you start a run, it's always worth double-checking your instrument's settings and making sure the lid is properly engaged.
At Cryonos GmbH, we understand that world-class science depends on the quality of every tool, from amplification right through to long-term storage. Our cryogenic solutions are engineered to protect your valuable biological samples with unmatched reliability. Discover our state-of-the-art storage systems at https://www.cryonos.shop.